Taking on a DIY hardwood floor refinishing project can be both rewarding and cost-effective. However, it’s essential to arm yourself with the right knowledge and tools for success. Here’s what you will learn from this comprehensive guide:
What You Will Learn
- DIY hardwood floor refinishing can save you money and provide personal satisfaction.
- Assessing your floor’s condition is crucial before starting the refinishing process.
- Understanding the characteristics of different wood types will inform your refinishing approach.
- Budgeting for tools, materials, and safety gear is essential for a successful DIY project.
- Establishing a realistic timeline helps to ensure your project runs smoothly.
- Post-refinishing care and regular maintenance are key to extending the life of your floors.
- Utilizing online resources and community forums can enhance your DIY experience and provide valuable support.
Understanding DIY Hardwood Floor Refinishing
Hardwood floor refinishing can seem daunting at first, but tackling it yourself can be incredibly rewarding! DIY hardwood floor refinishing offers not only cost savings but also a sense of accomplishment. In this section, we’ll explore why you might choose a DIY approach, how to assess your floor’s condition, and the different types of wood you might be working with.
Why Choose DIY Over Professional Services?
Many homeowners debate whether to hire professionals or take on the challenge of refinishing their hardwood floors themselves. Here are some compelling reasons to consider DIY:
- Cost Savings: Hiring professionals can be expensive, but doing it yourself significantly reduces labor costs.
- Personal Satisfaction: Completing the project yourself means you can take pride in your work and enjoy the results firsthand.
- Flexible Schedule: You can work at your own pace, allowing you to fit the project into your life without the pressure of someone else’s timeline.
While DIY refinishing has its perks, it’s essential to assess your skills and the complexity of the job. With some planning and preparation, you can achieve beautiful results!

Assessing Your Hardwood Floor Condition Before Refinishing
Before diving into the refinishing process, it’s crucial to evaluate the condition of your hardwood floors. Here are some indicators to look for:
- Scratches and Scuffs: Minor imperfections can often be sanded out, but deeper scratches may require more attention.
- Water Damage: Check for warping or discoloration, which may indicate moisture problems.
- Finish Wear: If your current finish is dull or peeling, it’s a sign that refinishing is needed.
Inspecting your floor thoroughly will help determine if refinishing is necessary or if a simple cleaning will suffice. For more detailed guidance on assessing wood floors, the GSA provides technical procedures for refinishing interior wood, which can be a valuable resource for identifying common issues and best practices.
Understanding Different Wood Types and Their Characteristics
Knowing the type of hardwood you’re working with can significantly influence your refinishing approach. Here’s a brief overview of common wood types:
- Oak: Durable and versatile, oak is often used and can handle multiple refinishes.
- Maple: Hard and resistant to wear, maple may require specialized tools due to its density.
- Pine: Softer and more prone to dents, pine offers a rustic look but may be less suited for heavy traffic areas.
Understanding these characteristics can help you choose the right techniques and products for your refinishing project. No matter the wood, knowing its traits allows for more informed decisions! For example, the USDA Forest Products Laboratory offers an extensive guide on finishing wood, which details how different wood species react to various finishes and what considerations to keep in mind.
We Want to Hear From You!
As you consider taking on your DIY hardwood floor refinishing project, what aspects are you most excited or nervous about? Share your thoughts below:
Frequently Asked Questions About DIY Hardwood Floor Refinishing
Why should I consider DIY hardwood floor refinishing instead of hiring a professional?
What should I look for when assessing my hardwood floor’s condition?
How does the type of wood affect the refinishing process?
What are the main costs involved in a DIY refinishing project?
How long does a typical DIY hardwood floor refinishing project take?
Evaluating the Cost and Time Investment of DIY Refinishing
When embarking on a DIY hardwood floor refinishing project, it’s essential to evaluate both the cost and time investment. Understanding these factors will help you gauge whether your project is feasible and aligns with your budget and schedule. Let’s break down the costs involved and how long the process typically takes!
You’ll be looking at a variety of expenses, from tools and materials to potential rentals. For example, prices can vary depending on whether you decide to rent or purchase equipment. Let’s dive into a detailed breakdown to help you budget effectively.
Detailed Cost Breakdown: Budgeting for Your Project
Creating a budget is one of the first steps in your refinishing project. Here’s a list of typical costs you might encounter:
- Sanding Equipment: Renting a floor sander can cost around $50 to $70 per day.
- Finish Products: Expect to spend between $30 to $100 depending on the finish type.
- Safety Gear: Personal protective equipment (PPE) like masks and goggles can cost about $20 to $50.
- Miscellaneous Supplies: This includes sandpaper, stains, and sealants, typically adding an extra $50 to $100.
By estimating these costs in advance, you can make informed decisions on what to prioritize in your refinishing process!
How Long Does it Really Take? Understanding the Timeline
Estimating the time required for your refinishing project is just as important as budgeting. On average, refinishing hardwood floors can take anywhere from 3 to 7 days, depending on several factors:
- Room Size: Larger spaces naturally take longer to refinish.
- Condition of Floors: More damage may require additional prep time.
- Drying Times: Finishes can take anywhere from a few hours to several days to dry fully.
Creating a realistic timeline will help you avoid frustration and ensure that your project is completed smoothly.
Project Planning: Key Considerations for a Successful Outcome
Planning your project carefully can make all the difference! Here are some key considerations to keep in mind as you prepare:
- Set a Clear Timeline: Allocate time for each phase, from prep to finish application.
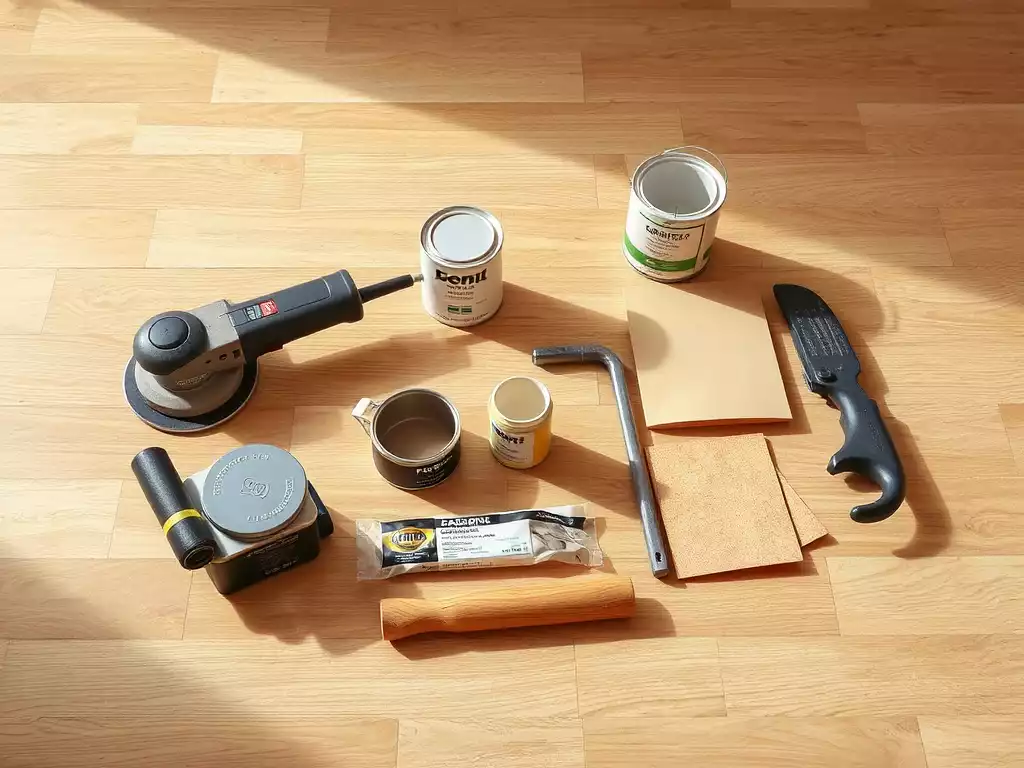
- Gather Tools Ahead of Time: Make sure you have everything you need before you start to avoid delays.
- Consider Weather Conditions: Be aware that humidity and temperature can impact drying times.
Taking these steps will help ensure that your DIY hardwood floor refinishing project is not only successful but also enjoyable!
Maintaining Your Newly Refinished Floors
Once you’ve put in the hard work to refinish your floors, it’s important to think about how to keep them looking great for years to come. Maintenance doesn’t have to be complicated, and a little care goes a long way!
Creating a maintenance routine will help you protect your investment and keep your floors shining. Let’s go through some best practices!
Post-Refinishing Care: Tips for Longevity and Protection
After refinishing, your hardwood floors need some special attention. Here are essential care tips:
- Wait Before Walking: Allow the finish to cure for at least 24 to 48 hours before walking on it.
- Use Area Rugs: Place rugs in high-traffic areas to reduce wear and tear.
- Avoid Water Damage: Clean spills immediately to prevent moisture damage.
These simple steps can help extend the life of your beautiful new finish. For a deeper understanding of proper care, the GSA offers technical procedures for stripping, staining, and polishing wood floors, which can provide insights into long-term maintenance strategies.
Cleaning and Maintenance Best Practices for Wooden Floors
Regular cleaning is crucial for maintaining your hardwood floors. Here are some effective practices:
- Use a Soft Broom or Vacuum: Regularly sweep or vacuum to pick up dirt and debris.
- Mop Sparingly: Use a slightly damp mop with a pH-neutral cleaner; avoid excess water.
- Schedule Professional Cleanings: Consider occasional professional cleaning for deeper maintenance.
By incorporating these practices into your routine, you can keep your floors looking as good as new!
Final Thoughts: Is DIY Hardwood Floor Refinishing Right for You?
Deciding whether to tackle a DIY hardwood floor refinishing project can be daunting, but with the right preparation and knowledge, it can also be incredibly rewarding! Consider your budget, time, and level of comfort with DIY tasks as you make your decision. Remember, the effort you put in can yield stunning results that you can be proud of!
Take the Next Step: Start Your DIY Hardwood Floor Refinishing Journey
If you’re ready to dive into the world of DIY hardwood floor refinishing, there are plenty of resources available to guide you. Let’s explore where you can find the best information!
Resources and Further Reading for DIY Enthusiasts
There are so many valuable resources out there to help you refine your skills:
- Online Tutorials: Websites like YouTube have countless video guides.
- Books and eBooks: Check your local library for books on floor refinishing techniques.
- DIY Blogs: Follow blogs dedicated to home improvement for tips and tricks.
These resources can give you the confidence you need to start your project with success!
Exploring Community Forums for Support and Expert Advice
Don’t underestimate the power of community! Connecting with others who have tackled similar projects can provide valuable insight:
- Online Forums: Websites like Reddit and DIY Network have active forums for sharing experiences.
- Social Media Groups: Join Facebook groups focused on home improvement for real-time advice.
- Local Workshops: Look for classes in your area where you can learn and ask questions.
Engaging with the community can make your DIY journey even more enjoyable and successful!
Recap of Key Points
Here is a quick recap of the important points discussed in the article:
- Benefits of DIY: Cost savings, personal satisfaction, and flexible scheduling make DIY hardwood floor refinishing appealing.
- Assess Floor Condition: Check for scratches, water damage, and finish wear to determine if refinishing is necessary.
- Know Your Wood: Different wood types, like oak, maple, and pine, require specific refinishing techniques.
- Budget Wisely: Estimate costs for sanding equipment, finish products, safety gear, and miscellaneous supplies before starting.
- Time Considerations: Refinishing can take 3 to 7 days depending on factors like room size and drying times.
- Project Planning: Set a clear timeline, gather tools in advance, and consider weather conditions to ensure a successful project.
- Post-Refinishing Care: Allow finishes to cure, use area rugs, and clean spills immediately to protect your floors.
- Regular Maintenance: Sweep, mop sparingly, and schedule professional cleanings to maintain the beauty of your hardwood floors.